A few months ago I dropped it in the supermarket. It landed flat on the screen and when I picked it up I was horrified to discover a spiderweb-shaped crack in the screen. Fortunately, everything still worked. For $70 I had it repaired at Volt Mobile. They did pretty good work, but the touchscreen was intermittent (I'd have to flex the phone to make it work again).
Last week, I dropped it again. This time the touchscreen was completely broken--I couldn't even turn the phone off or enter my passcode to do a backup.

This time, I figured I'd try my own repair. Hey, it's worked in the past.
A quick look online shows several places that sell digitizers (touchpads), LCD screens, batteries, you name it. I ended up going with a digitizer sold from AccessoryOne (which purports to be OEM) for less than $20 shipped and taxed. There is also a three-part video series on cracking open the iPhone and swapping out the digitizer. The videos are made by http://www.directfix.com/ who also have parts but tend to charge a bit more.
This blog basically chronicles my repair. If you're doing this yourself, watch the videos; they're much more informative. Also, there is no guarantee that this will work, and it will void your warranty (mine has already expired). I just figured that I'll be upgrading to the 4th-generation iPhone when it comes out anyways.
The first step was pulling out the screen assembly. Two screws from the base (near the speakers) are all that is holding the screen assembly on. Unlike the videos, I used a suction cup on the screen near the home button to pull the screen out. I believe this works better and doesn't molest the rubber seal around the screen assembly. This picture shows the screen assembly removed from the base:

This picture shows the new digitizer/glass on the left top, the removed LCD screen on the left bottom and the old frame/digitizer assembly on the right bottom:

Removing the LCD screen is tricky and must be done carefully. I've read posts from people who crack their LCD screens at this step and it's a much more expensive component. I was very gentle.
The digitizer that I ordered was just the glass/digitizer combo; it didn't include the screen frame or the components that are mounted to it (speaker, skin sensor, home button, etc). Therefore, the frame must be removed from the original glass/digitizer and attached to the new one. This was probably the most tricky part. It involves using a hair dryer to weaken the glue and pry the frame off. Then new two-sided tape must be applied to the frame and attached to the new glass/digitizer.
This picture shows the removed frame (bottom center) and the old cracked digitizer on the bottom right:

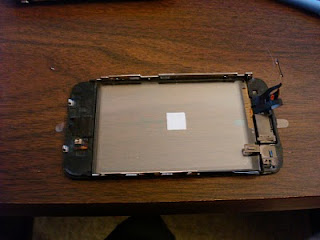
After a few minutes of work, the frame was attached to the new glass/digitizer:

The new glass had an appropriate amount of protective film, so it was fairly easy to minimize dust getting in between the screen and the glass. The new screen assembly with LCD installed is now shown on the bottom:

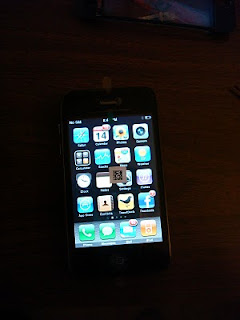
After getting the screen cables connected I powered on the phone and was able to enter my passcode to unlock the phone (note that the protective film is still on the screen, hence the sticker in the middle of the screen):

Yay! All-in-all, a very successful repair for under $20 and about an hour.
Now... to find a better case...