Showing posts with label repair. Show all posts

15 April 2010

/resurrect iPhone

I broke my iPhone 3G. Again.

A few months ago I dropped it in the supermarket. It landed flat on the screen and when I picked it up I was horrified to discover a spiderweb-shaped crack in the screen. Fortunately, everything still worked. For $70 I had it repaired at Volt Mobile. They did pretty good work, but the touchscreen was intermittent (I'd have to flex the phone to make it work again).

Last week, I dropped it again. This time the touchscreen was completely broken--I couldn't even turn the phone off or enter my passcode to do a backup.


This time, I figured I'd try my own repair. Hey, it's worked in the past.

A quick look online shows several places that sell digitizers (touchpads), LCD screens, batteries, you name it. I ended up going with a digitizer sold from AccessoryOne (which purports to be OEM) for less than $20 shipped and taxed. There is also a three-part video series on cracking open the iPhone and swapping out the digitizer. The videos are made by http://www.directfix.com/ who also have parts but tend to charge a bit more.

This blog basically chronicles my repair. If you're doing this yourself, watch the videos; they're much more informative. Also, there is no guarantee that this will work, and it will void your warranty (mine has already expired). I just figured that I'll be upgrading to the 4th-generation iPhone when it comes out anyways.

The first step was pulling out the screen assembly. Two screws from the base (near the speakers) are all that is holding the screen assembly on. Unlike the videos, I used a suction cup on the screen near the home button to pull the screen out. I believe this works better and doesn't molest the rubber seal around the screen assembly. This picture shows the screen assembly removed from the base:


This picture shows the new digitizer/glass on the left top, the removed LCD screen on the left bottom and the old frame/digitizer assembly on the right bottom:


Removing the LCD screen is tricky and must be done carefully. I've read posts from people who crack their LCD screens at this step and it's a much more expensive component. I was very gentle.

The digitizer that I ordered was just the glass/digitizer combo; it didn't include the screen frame or the components that are mounted to it (speaker, skin sensor, home button, etc). Therefore, the frame must be removed from the original glass/digitizer and attached to the new one. This was probably the most tricky part. It involves using a hair dryer to weaken the glue and pry the frame off. Then new two-sided tape must be applied to the frame and attached to the new glass/digitizer.

This picture shows the removed frame (bottom center) and the old cracked digitizer on the bottom right:


After a few minutes of work, the frame was attached to the new glass/digitizer:


The new glass had an appropriate amount of protective film, so it was fairly easy to minimize dust getting in between the screen and the glass. The new screen assembly with LCD installed is now shown on the bottom:


After getting the screen cables connected I powered on the phone and was able to enter my passcode to unlock the phone (note that the protective film is still on the screen, hence the sticker in the middle of the screen):


Yay! All-in-all, a very successful repair for under $20 and about an hour.

Now... to find a better case...

30 November 2008

/resurrect Xbox-360

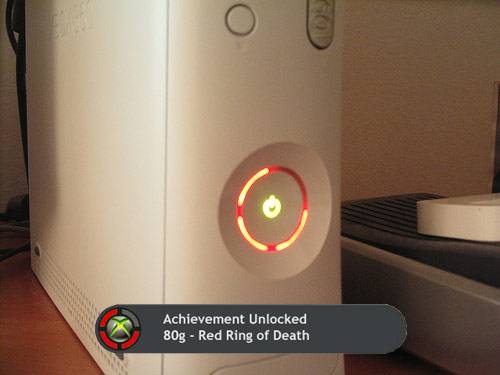
I sat down on Saturday to enjoy some Lego Star Wars with my son, but discovered a different feeling welling up inside me instead: dread. My Xbox-360 had fallen victim to every Xbox owner's nightmare--The Red Rings of Death.

He opted to play Super Mario Galaxy on the much more reliable Wii instead, while I googled everything I could about the RROD.

It's interesting to note that Microsoft extended the warranty on the 360 to 3 years. However, I purchased my xbox used from a friend and don't have the receipt from the original purchase. Additionally, the date of manufacture shows as 11/03/2005, so warranty repair seemed like a non-option to me. Plus, I've had friends send their xbox in for warranty repair and it's taken them over a month to get them back. I'm impatient when it comes to gaming! But if you are reading this and have a xbox that is still under warranty, please consider the options carefully before breaking that silver warranty sticker! There is no going back!

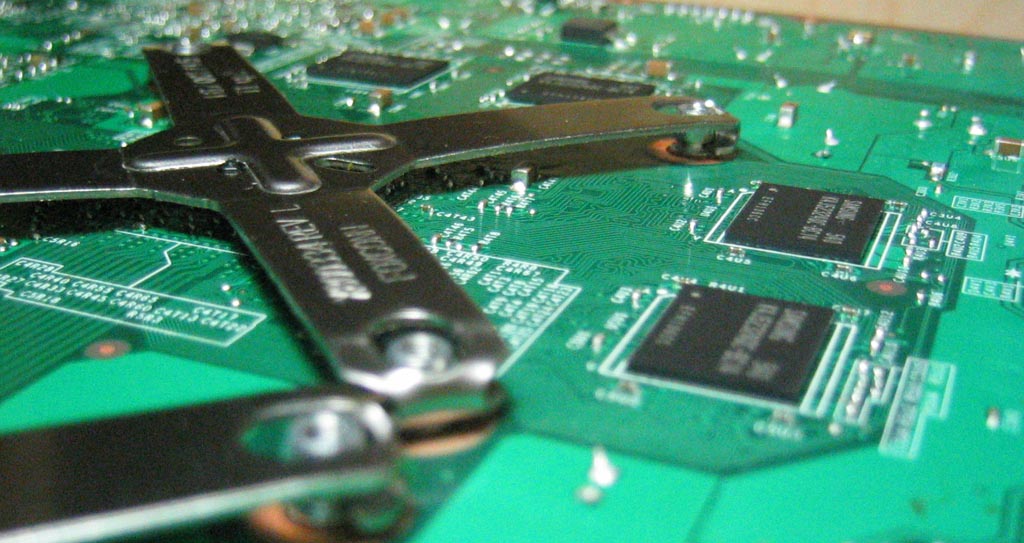
I found a guide that provided an at-home remedy for repairing the RROD. A good theory about what causes the RROD is a design flaw leading to flexing the motherboard. This warping leads to microscopic breaks in the tiny surface-mount solder connections exacerbated by numerous heat cycles. The guide directs you to fix the problem by removing the x-shaped brackets holding the heat-sinks to the CPU and GPU and replacing the mounts with screws from any old hardware store.

I thought, "Eh, why not."

So I tore down my xbox:


Getting the heat-sinks off was a pain, but persistence pays off:


The guide I was using didn't tell me this, but you'll also need a 1/4" socket or nut driver to get the posts out of the heat-sinks.

The next step was to clean off the old thermal paste from the chips so that new thermal grease could be applied:


To do this, I used left-over ArctiClean from my last project of this nature. Using the ArctiClean produced a very high-quality mirror shine from the CPU, GPU and heat-sinks:


I staged my bolts according to the guide, put the washers on the motherboard and applied the directed amount of Arctic Silver 5 (about .5 - .75 the size of a grain of rice) to the GPU right before replacing the heat-sink. I then spread the thermal paste out over the chip with the edge of an old plastic gift (credit) card:


The GPU heatsink was then applied, careful to make sure that I had all screws started before allowing the heatsink to contact the surface of the GPU. I very carefully tightened the screws until they were just snug, but evenly snug. Repeat the whole ordeal for the CPU. Here's what the bottom of the motherboard looks like now without the x-brackets:


Note the eight hex cap screws. I recommend using normal phillips machine screws if you can find them. Unfortunately, my local Home Depot didn't. This was all I could find. Originally I had washers on both sides of the motherboard, but the taller hex cap screws had major clearance problems trying to fit back in the metal case. I had to (carefully) remove each screw, remove the washers on the bottom of the motherboard and then replace the screw. I was very glad that I had only snugged the screws earlier.

According to the guide, at this point you should place the motherboard in the case, hook up the necessities and fire it up without the fans to purposely overheat the system and cause the solder to re-melt back into place. However, when I booted it up at this point, there were no more red rings!


Apparently, between the new fastenings for the heatsinks and the better thermal grease on the chips, the problem was fixed! I finished re-assembling the chassis and decided it was time for a real test. I took it back downstairs and hooked it up to the TV, re-inserted the hard disk and memory card and grabbed a controller.

I played Braid for over a half hour with no problems, though I do wonder how permanent this solution will be. If it does break down again, I'll come back and update.

8/9/2010: After 21 months the RROD have returned. I haven't actually pulled the machine apart again to check it out, but it might be worth buying a refurbished base model at this point!

20 July 2007

/resurrect PSP

A few weeks ago I sat down on a plane looking forward to returning home from vacation. I pulled out the PSP to watch a few episodes of The Office on the ride. Lo and behold, I'm greeted with a PSP owner's worst nightmare: a cracked screen.
DSC00593

I wasn't ready to write off the $200 that I paid for it though, and Google was more than willing to help me out. Amazon even listed some screens for sale for a very decent price. I ordered a new screen (with backlight, not because mine was bad but I'd rather pay $5 than having the hassle of trying to swap backlights without getting any dust in there) from The Gaming Shop on the 13th and it arrived today (7 days for North LA -> San Diego? That's sad.) I don't really recommend getting the screen from them because this is how it came:
DSC00591
Loose, in bubble wrap, not even in a cardboard box.

Like a kid on Christmas morning, it's time to work on my PSP! I used The Llama's excellent PSP screen replacement guide. I'll let the photos do the talking:
DSC00594 DSC00595 DSC00596 DSC00597 DSC00598 DSC00599 DSC00601 DSC00602

Then, the moment of Truth:
DSC00603

Woot! The brand-new screen fires up beautifully with no dead pixels! Just a few more screws and we're done:
DSC00604

I managed to replace my PSP's screen for about $50 (and a fun 45 minutes or so) rather than buying a new one at $169. Looks like I'll be investing in a hard-shell case soon too!

10 June 2007

Video Card Woes

For a while now, I've been rather loathe to play any 3D games due to subtacular performance. Even my own game (EverQuest II) had become unfun and choppy. My home rig isn't that shabby: AMD x64 4000+, 2GB RAM, ATI X800 XT Platinum video card. So why the bad performance?

At first, I thought it was a problem with EQ2. I have all of the source code, but since I don't run Intel at home, VTune was out of the question. So I wrote my own simple sampling profiler (which works pretty well I might add) that basically lets me know where the main thread was spending all of its time. On a healthy system, this is typically in the CPU-bound vertex transformations for animations (side note: don't ask me why this isn't in a shader).

However, that's not what I was seeing. I was seeing the most time spent handing geometry to the card. After doing a little research, I discovered that this might be because the card is overheating and the drivers were decelerating the VPU. I downloaded the ATITool to have a look-see.

Sure enough, my VPU was reaching temps of up to 110 C (zomg!) playing EQ2 in full-screen mode. It was slightly better windowed, but still hotter than hades. The fan was visually observed to be spinning at 100%. I figured I might as well try out Mike Vande Ven Jr's solution before I go drop $500 or more on a new card.

I ripped the card out and used a generous amount of canned air to get all the caked-on dust off the card. There was plenty for a 3-year-old card. Then the heatsink had to come off. This was actually pretty easy: just pop out 3 phillips screws. The old thermal grease was definitely pretty nasty. It appeared to be more solid than it should be:
DSC00391

I used a plastic card to scrape away all of the old grease. Then I used Arctic Silver ArctiClean to remove the rest of the old stuff. It was amazing how much it cleaned up the heatsink and VPU. Unfortunately, I was too excited to take a picture, but here's an idea from a 9800. After I could see myself staring back from the VPU, it was time to apply the new thermal grease. I chose Arctic Silver 5 because it's what all the overclockers use. The instructions say .5-.75 of the size of a grain of rice, and then spread it around with the plastic card:
DSC00394

I threw the heatsink back on, careful to evenly tighten the screws that put the pressure on the VPU. Initial tests are already showing idle temps to be around 15 C lower, with load tests not even breaking 50 C (the idle point prior to the grease change). I'm having issues with a hard drive now, so I'll confirm results later when actually running a game.

Update: I ran around in EQ2 for a while and hit a max temp of 72 C with the fan only spinning at 67%. And this in full screen! Previously it would overheat the card to the point of shutdown. I'd say it worked!